
Please note that this recipe has been updated. I have increased the amount of oil and molasses, replaced a little of the flour with ordinary plain white, and adjusted the baking temperatures. The texture of the bread has improved as a result.
This is enough for two 12cm x 22cm loaf tins or one tin loaf plus 8 rolls
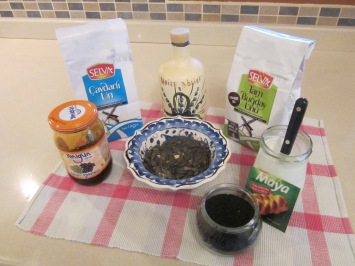
300g rye flour
300g wholemeal flour
100g plain white flour
425 ml lukewarm water
1 sachet active dried yeast (it comes in 7g or 10g sachets – either is fine)
1 teaspoon salt
100g mixed seeds/nuts etc of your choice (or leave them out)
2 tablespoons olive or other oil (or melted butter)
2 tablespoons black treacle or other molasses or 1 tablespoon brown sugar
1 tablespoon yogurt or buttermilk
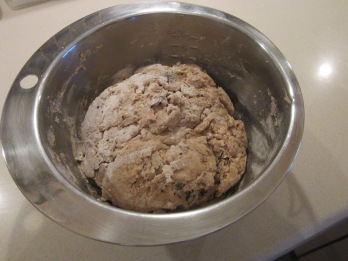
Put the flours, salt, yeast and nuts/seeds into a large bowl. Give it all a good mix around – I find a table knife ideal for all mixing jobs here. Make a well in the middle and add the water/oil/molasses and yogurt. Start stirring with your knife (or other weapon of your choice, but I promise you I’ve tried them all and a knife is easiest). You will need to grip the bowl firmly and give it some welly, no room for delicacy here.
You will end up with a rough dough that looks a bit like this:
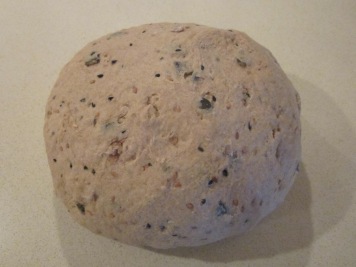
Sprinkle plenty of flour onto your worktop and tip the dough onto it – if there are bits of loose flour and seeds in the bottom of the bowl, just chuck them on top. Start kneading the dough, by folding the dough into the middle and then pushing it away from you with your fist, moving the dough around as you go. Within a minute or two, you should feel the dough become much smoother and if you gently poke it with your finger, it should feel a bit springy. Don’t let anyone tell you it’s necessary to go at it for hours on end – that is a myth. As long as the dough is smooth and feels slightly elastic, that is absolutely fine. It is the proving time that is important, not the kneading.
Your dough should now be looking a lot smoother, pretty much like this:
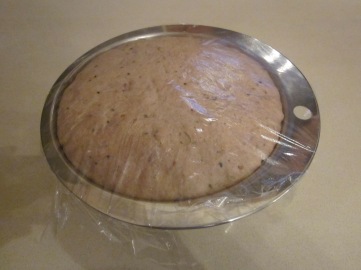
Wash and dry your mixing bowl, then put a few spots of oil in the bottom. Return the dough to the bowl and roll it over so that it has a very light coating of oil all over (you only need about a quarter of a teaspoon of oil). This stops the dough sticking to the bowl or to the clingfilm on the top. Cover the bowl with clingfilm and put in a draught-free place until the dough has doubled in size. This may take an hour or up to two hours, depending on how warm the room is. (You can prove for several hours or overnight in the fridge if you prefer).
Here’s mine, attempting to climb out of its bowl:
Now tip the dough back onto your worktop and knead it gently (add any dried fruits/cheese/olives etc at this point). All you want to do is push out the air and make sure any additional ingredients are well incorporated – there’s no need to go wild.
Cut the dough in half* (I do actually weigh mine, as I have ended up with one loaf much smaller than the other in the past – I usually give my second loaf to my lovely neighbour Linda, and things could get awkward if she thinks hers is smaller than ours).
Just using the flat of your hands, stretch each piece of dough out into a rough square, then roll it up and place into the tins. Flatten it down and push the dough well into the corners. Brush a little oil onto a piece of cling film (or I usually use the same piece that I’ve used to cover the bowl as it handily already has oil on it from the top of the dough, and there’s no need to even further abuse the planet with yet another sheet of polythene). Cover the loaves with the cling film and leave in a draught-free place to prove – here’s mine having a cosy time near the fire, as it was a very cold day:
![IMG_0422[1]](https://aviewfrommykitchen.com/wp-content/uploads/2016/01/img_04221.jpg?w=376&h=254)
Leave to rise for about 20 minutes, then switch your oven on to preheat to 220C. If you have one, put a baking sheet or shallow tray into the oven to preheat – standing your loaves on this will give you a crispy bottom – the bread, not you.
By the time the oven has reached temperature, the dough should be rising slightly out of the top of the tins – if not, leave for a few minutes more. Once they are ready, very gently remove the clingfilm (you don’t want to squish out any air) and place the tins on the preheated baking tray in the oven.
Immediately reduce the temperature to 200C and bake for 25 minutes. Remove the loaves from the tins, turn them upside down and bake for about another 5 minutes to crisp up the crusts. Take one out and tap the base with your knuckle – if it sounds hollow your bread is done, if not, give it another 3 – 4 minutes in the oven. A probe thermometer, if you have one, should show an internal temperature of about 93 – 95C.
Once the bread has cooled, you can slice it and put it in the freezer if you wish. (Tip: turn the bread upside down and slice from the bottom up – much easier and bits of crust won’t fall off).
*If you want to make rolls with the second half of the dough, roll the dough into a sausage or round and cut into 8 evenly sized pieces (if your family are likely to squabble, you can weigh the dough to make sure they are roughly all the same). Place each piece of dough on to a completely clean (no flour) worktop, cup the palm of your hand over it and roll it round and round a few times – you will end up with a perfectly smooth ball. You can leave it this shape for a round roll or flatten it slightly with a rolling pin for a bap shape. For long rolls, obviously roll into a sausage shape and flatten as you wish. If you want the tops to stay soft, taking care to be extremely gentle, brush with milk just before you put them into the oven.

Hi Jayne,
I’m ready to make some bread, and remembering yours. We’ll see if mine is as good as what I remember. I’m making the soda bread first (with pekmez, yippee!) but then it’s on to this.
A few questions re this bread:
– I’m not sure about the yeast in this recipe: in Canada we have what we call ‘regular’ yeast and also ‘instant’ yeast. Both are dried. Can I assume this would be instant yeast? That’s the one people used to use in bread machines, if that helps.
– Some of your recipes specify a temperature for a fan oven rather than conventional, and I’m assuming that’s true for this one too.
– And – do you usually use pekmez in this recipe too?
Thanks – now on to the soda bread!
xx Mela
LikeLike
Hi Mela, yummy – just had soda bread for my breakfast and can highly recommend it! Yes, I use the instant yeast, which you can just add with the other dry ingredients. The other type would be absolutely fine too, but you would need to reactivate it by letting it sit in the warm liquid first for five or ten minutes first, then add the liquid to the dry ingredients once the yeast has frothed (ergo proving it is still alive).
Yes, I use pekmez anywhere that calls for molasses – it works a treat and gives a lovely flavour.
All of my temperatures assume a fan oven – if you are using a conventional oven, raise the temperature by between 10 and 20 degrees, depending on how hot your oven is (most people know whether their ovens tend to be on the hot or cool side).
Let me know how it turns out.
Afiyet olsun!
LikeLike